Create an interactive burger menu in a PDF with Adobe InDesign cc 2017 [tutorial]
This tutorial will guide you step by step on how to create an interactive burger menu in a PDF using InDesign.
If you would like to download the final file immediately, scroll to the end of the tutorial.
1. Create your document

Create your InDesign document in the size that you prefer. I use A4 landscape for most PDF files.
Design a menu like the one shown above or one of your choice. It is important that it contains a menu icon button (simply design the icon for now) and as many menu items as you like.
2. Create the button for the menu icon

Once you have created your design we now need to convert it into a button so that it is possible to click on it.
Select the menu, group all the elements of the menu icon [cmd+G]. In my example above, you can see that i have grouped the black circle and the three white lines.

Whit the new group selected, open the button and forms window (Window>Button and Forms);
From the "Type:" drop down menu select "Button" or click on the icon on the bottom right corner of the window, next to the bin icon, to convert to button. They both work in the same way.

To make sure that your group is correctly converted to a button, check that the new icon looks like the above when selected. It need to show a blue thick dashed line around it.

We also need to add a name for the button. This is a very good practice to follow every time you work with buttons and forms. Especially if you have a very big file with a lot of buttons, actions and menus, it is always important to have all your objects properly organised and labelled.
Lets call this menu button btnMenuClose.
Now we need to create another button which is exactly the same of btnMenuClose and it will be in the exact same position. You can simply copy and paste and position it exactly above the button that we already have. Lets call this new button btnMenuOpen.
Finally lets check the box "Hidden until Triggered" for the second button btnMenuClose. We will see below with an example why it is important to check this this box. [section 4]
3. Create the menu items

Your menu items can be formed by any element you like. In our example above I used a rectangular black shape and a text area for the name of the button.
You can add images or icons to the button if you like too. It is important that, once you have finished designing your button, you group all the elements that form it like in the image below.

4. Create the buttons for the menu items

After you have grouped your buttons individually with their shape, name and, if you have it, icons, you can proceed to create a button.
Like we have seen before, select the group and from the "Button and Forms" window select "Type: Button" to convert your object into a button.
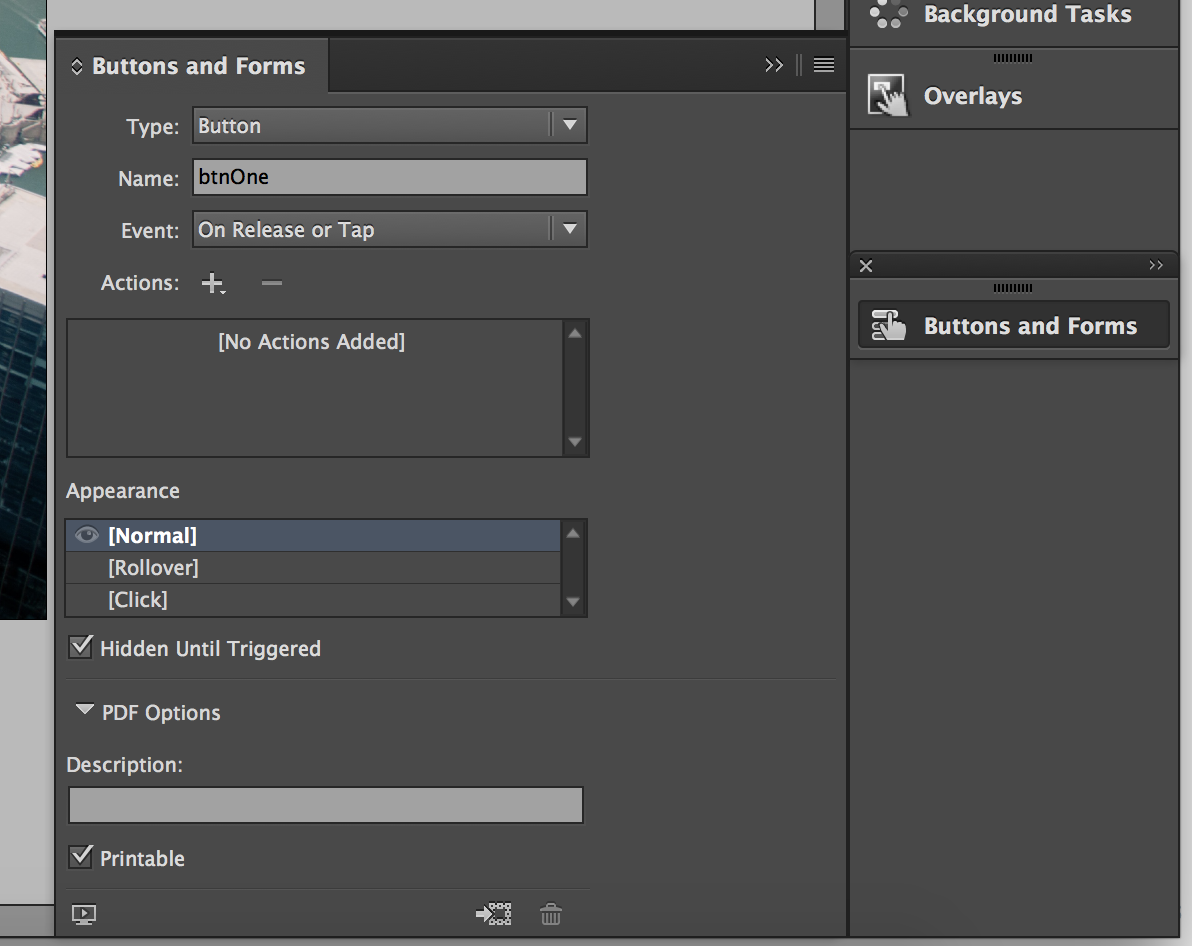
Remember to always name your new button. I have used the name btnOne
You should now have something like the image below with the button showing the thick dashed blue line around it.

After you have created the menu item button, another important thing to check is that the "Hidden until Triggered" checkbox is CHECKED.
This is because we want the menu items not to appear on the page until we click on the menu button. We will see below how to make these buttons appear, for now just remember to check "Hidden until Triggered" on all menu items (menu one,menu two,menu three,menu four)
If you now select all the elements in your page you should see the thick dashed blue line around all the elements like in the image below:

You will also notice that now all the layers are grouped and named accordingly to the names you assigned to your buttons.

The image below show one more time that the menu button btnMenuOpen (selected) is not set as "Hidden until Triggered" in the Buttons and Forms window but btnMenuClose is.

5. Assign Actions to your buttons


Select the button btnMenuOpen. You can check you have selected the right button by checking the name in the "Buttons and Forms" window Name area. You can also check you have selected it by checking the layers window. If there is a coloured square next to the name of your button, that is the selected button.
Lets move our attention now on the"Buttons and Forms" window. To add an action to a button we need to check that the Event is set as "On Release or Tap". This will ensure that our action gets executed when you click on or tap on the button.
We can now assign the action to the event. To do so click the dropdown icon marked as a "+" next to Actions. Select Show/Hide Buttons and Form. This action enables a series of options that will allow us to set what parts of our PDF need to be visible or hidden. We will learn how to manage these options in the next step.
6. Set the options to show the menu items

NOTE: i have removed btnFour from our example.
A window called Visibility will now appear in your Buttons and Forms window. In this area you can give instructions to all the forms and buttons on the page. You should be able to see all the buttons we have previously created on our page.
What we want to do now is to show all the menu items when we click on the menu icon. But we also want to make sure that our menu items will disappear if I click again on the menu icon. To achieve this on an interactive PDF we have to get help from the second menu icon button we created previously: btnMenuClose. This is because one button won't automatically open and close a menu. What we are doing is hiding and showing elements. So we need to hide the btnMenuOpen and make visible btnMenuClose. We will then make sure that when we click on btnMenuClose it will hide btnMenuClose and make visible btnMenuOpen. Lets continue with our example to help clarify this.
With btnMenuOpen selected lets focus on the Buttons and Forms window and, with the actions sets as above, lets click on the X in the Visibility area next to btnMenuClose until it change to the symbol of the eye. Lets do the same for all the menu items: btnOne, btnTwo, btnThree. And finally lets change btnMenuOpen to the symbol of the eye with a line across it.
7. Set the options to hide the menu items

Now we have to make sure that when we click again on the button t will make the menu items disappear. To do so we have to behave exactly like we did before but making sure we hide and make visible the correct elements.
With btnMenuClose selected lets click on the X in the Visibility area next to btnMenuOpen until it change to the symbol of the eye.
We want at this point, to make the menu items disappear so lets click on the X in the Visibility area next to each one of the buttons btnOne, btnTwo, btnThree until they change to an eye with a line on it.
Finally, lets change btnMenuClose to the symbol of the eye with a line across it.
Check the image on the side to make sure the all the elements have been set correctly.
8. Export the PDF file
The PDF file must be exported as interactive PDF. Make sure your settings match the below image.
